
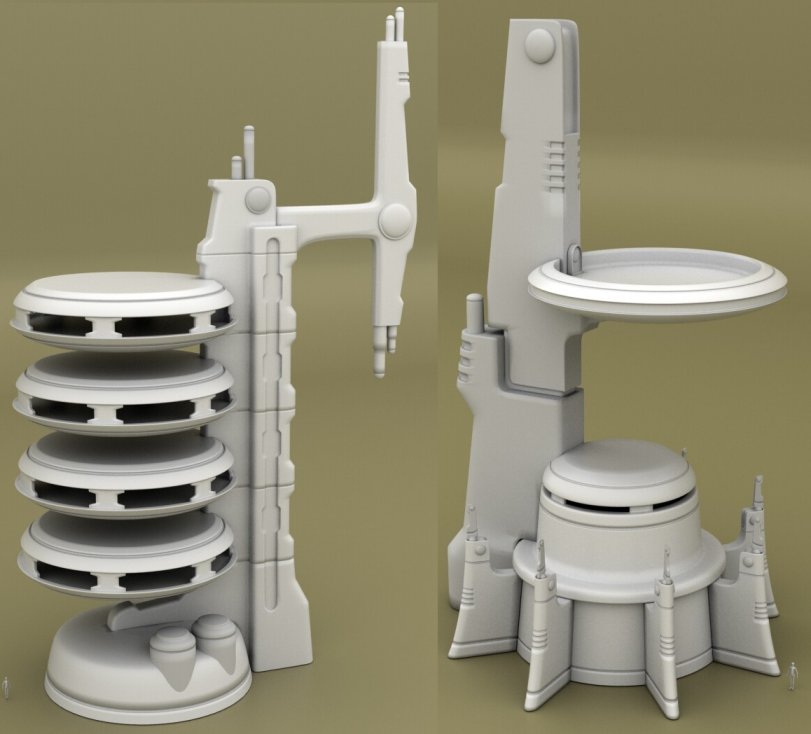
 | It's the start of a new year and hopefully the start of a new design for my Tau buildings. As I have adopted the hexagon bases purchased from Fluid 3D rather than the skewed self cut ones, I'm abadoning my current circular tower and previously made circular platform in favour of hexagon bases. It's a shame after the effot put into the hexagon column for my tower, but it was just too difficult to cut and shape. Although a hexagon central column does mean I can place six stands around it, the ones behind would be obsecured from view. Hence coming across some designs made by Sean H Bullough, I'm going to try and use this concept to build my new hexagon towers. Hopefully these will be easier to make. |
|
0 Comments
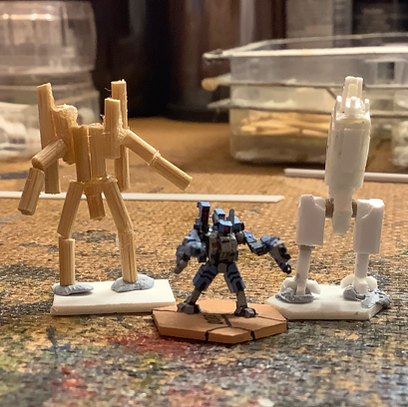
 There are various images I've been referring to, but no clear direction as yet, just a bunch of material and thoughts. As I always change designs, I definitely will be using magnets. So the project is to make either a raised platform or a multi-tiered tower, Unfortunately the Tau circular designs means that it'll be hard to create a curved wall, so I'm not quite sure what to do yet. I just need to have it raised so I don't have to take photos of the ground due to the uncertain terrain I want to have my army of Tau taken on (Tyranids on rocks, Orks in a dessert like, Eldar in grassland etc).
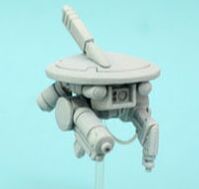
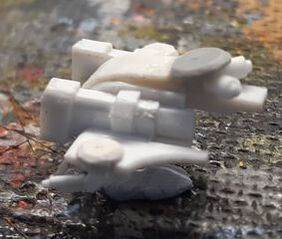
The drones are based off this picture. Once again unsure who to credit for this creation due to the amount of images I've saved over the years from Pinterest. Two drones with welding torch as they would be the ones making the Tau floor tiles. Both fit onto the wing of my Hub Drone, one more snugly than the other. I've also extended the rear of the Hub Drone so it didn't look too short. I was tempted to extend it further to mount more drones, but decided to park that idea. Just a few more detail to add to the drones and potentially completed. I've used some transparent rod for the Hub Drone and currently planning to do the same for the drones.

origin despite google image search). Then I worked on some new discs, sanding them down was not easy holding onto such small items. I had a mini vice that I couldn't find either. Looking for the old post above I found that this site did it again and replaced a lot of the old posts with new images :( It may be time to find a new home.
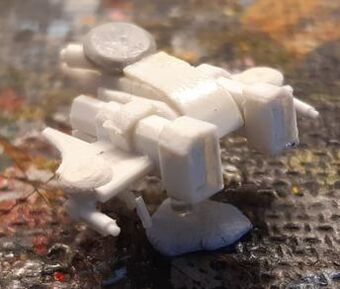
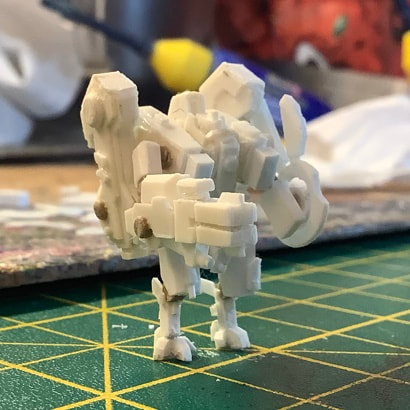
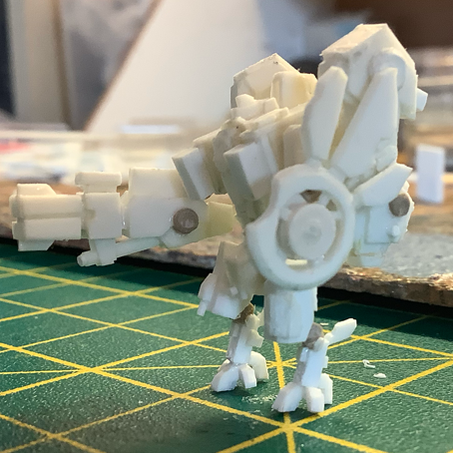
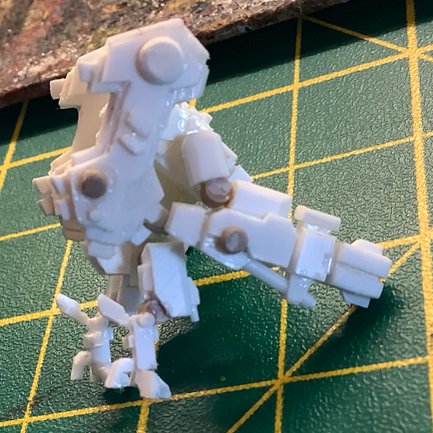
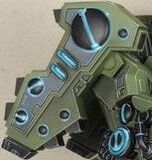
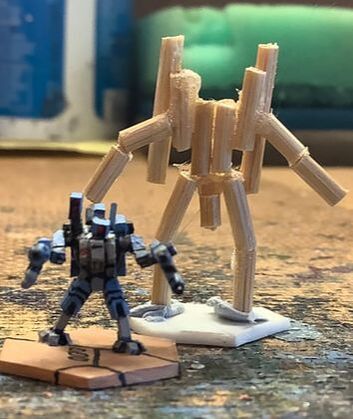
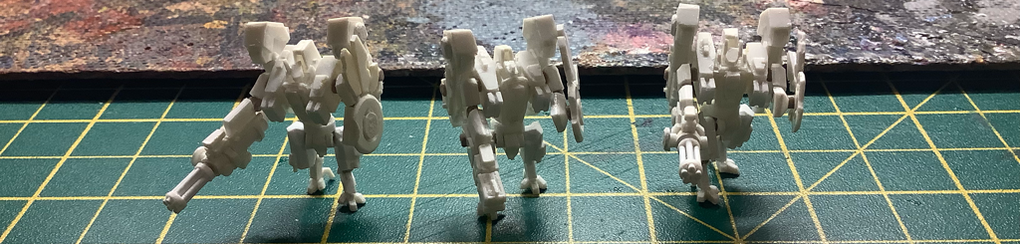 Finally reached the end, although that's not exactly true. I decided to abandon the extra shoulder armour as the shield wings got in the way. Also missing is any support systems and the secondary weapons. However I think I need a break and do something different. Three months I've been working on these three... or four if you count the prototype with a larger body and stubby legs :( Not sure what to do with that one. Considering I was planning six in total, another three would likely result in half a year working on these Tau Riptides. At least despite not gluing the upper body to the legs, they balanced quite well and remained standing. It's also unlikely I'll start painting these either :(
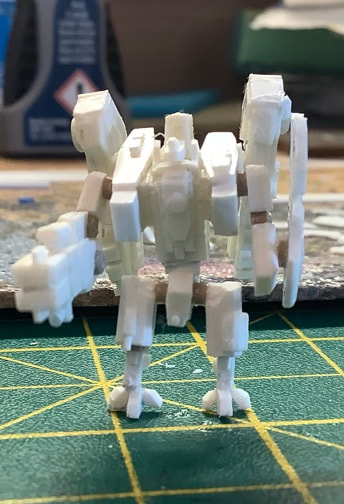
First for the year, although the amount of detail I went into set the standard high for the rest of the year :( Rather than work with precision, I ended up using the melting plastic approach to fill in the gaps and smooth out corner joins. The proportion of the legs compared to the body needs a bit of work, but at least it free stands... but hopefully will as the torso isn't actually glued together yet. So on to painting it? Possibly not as I'll want to make several more. I learnt from previous Battlesuits, I tend to use existing model for comparison and end up breaking the original. Also while typing this entry, I realised I missed out the additional shoulder armour pad. So technically not quite complete. Unfortunately I got too much house DIY to do, so potentially go quiet for a while.
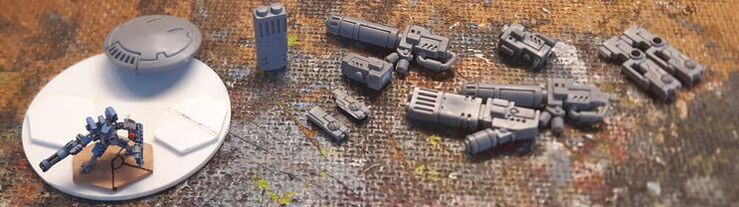
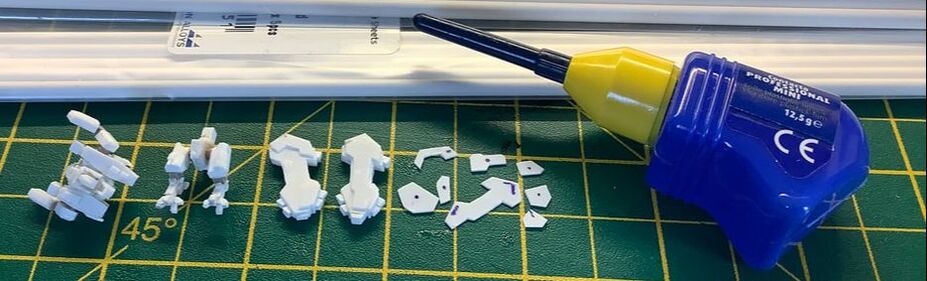
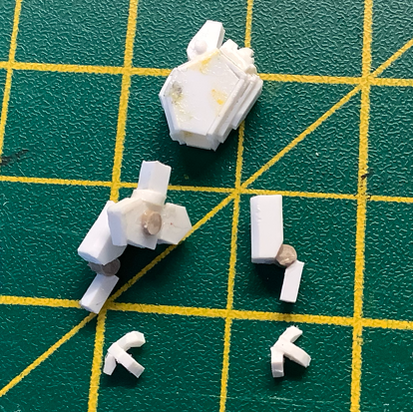
So I have new hardware (first category), however the new rods are made from a super styrene that doesn't melt like the other plastic I have. Hence if I do use them, I'll need an alternative glue. The jetpack came off the model as I decided to go the extra layer (concept category) to match the design on the existing Riptide model. Luckily the left over small bottle of glue from a model kit my son did helped. The old bottle's tip was gone and I get the glue coming out in splodges. This small bottle seems far easier to use than the standard size ones. Also my templates that I started making for this model is increasing, they don't work all the time, but far easier than trying to jot down the measurements. I just need to remember which template is for which part of the model. So the majority of the model has numerous details added (WIP and Tau Category), I just need to find a way to mount the circular discs with some new glue and put it all together... again.
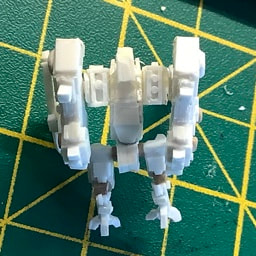
The feet will likely be the only change I make in the design and follow the simple three toe flat with a heel as I did with the Battlesuits. Overall it is probably 2mm taller than I would like, but not so bad that I need to re-make the whole body. However will be something considered for any further ones.
Uhu glue that wasn't too messy to stick this together, but just a little sticky than expected. I was pleasantly surprised that it worked out so nicely first time. I just hope this concept is the kick start to getting more stuff made.
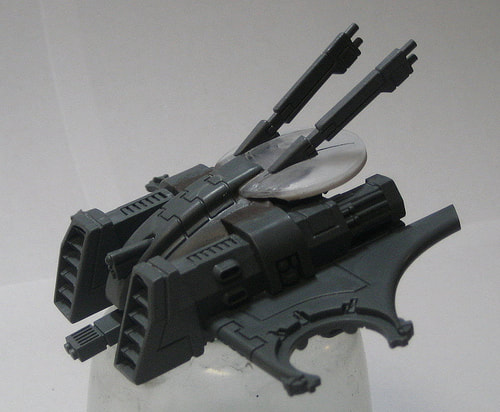
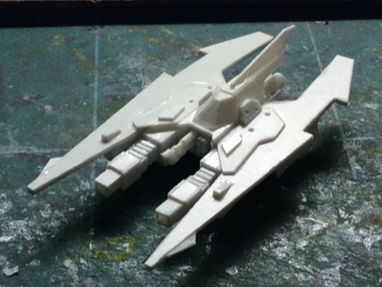
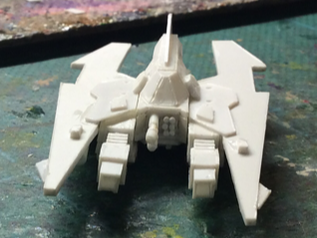
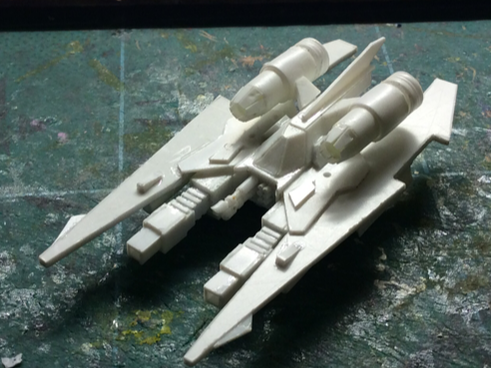
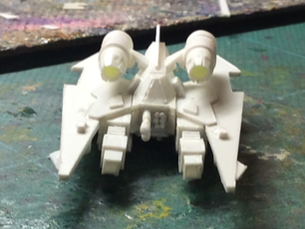
 I glued on the top engines, then decided to cut it off and see if I could make it removable, then gave up. Glued them on again, then thought I'd take a picture without them. Overall the engines were glued on three times. I'm still undecided whether I like the engines (true to one of the images I was basing this on), or leave it off and be more like the Hell Blade. The hover jets on the bottom was a dangerous task as I was holding something small between the fingers and pushing a drill bit spinning 5,000 rpm to make the hole, but luckily no blood. There is the angled stand too, however without the top engines, it tips forward due to the weight of the weapons. Luckily if I decide to leave the engines off, I can take this apart and add some weight into the rear end of the fuselage.
|
Categories
All
Click here for Category definition
Archives
April 2024
|

 RSS Feed
