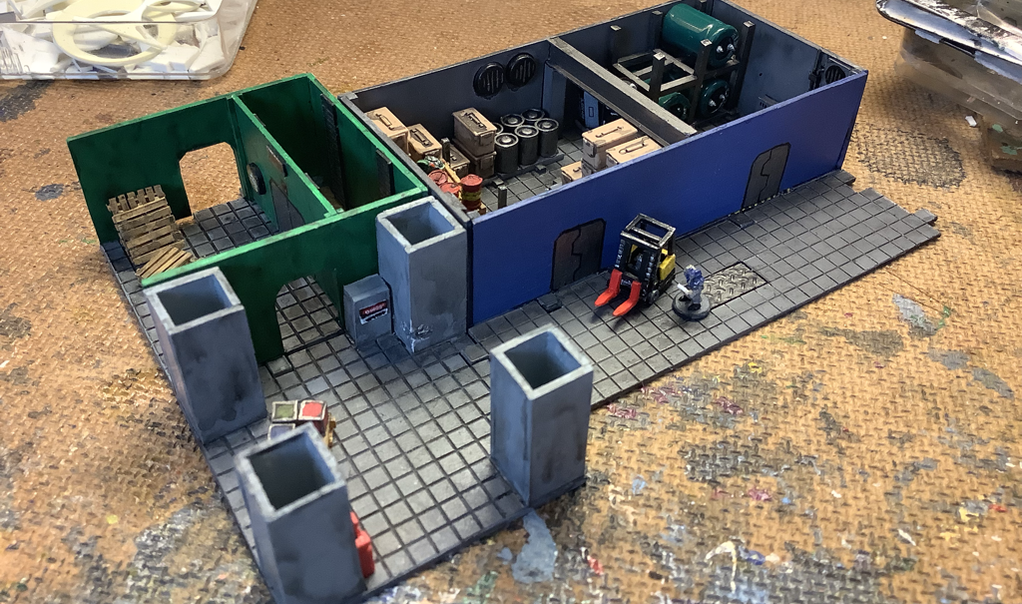
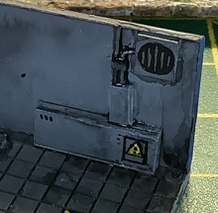
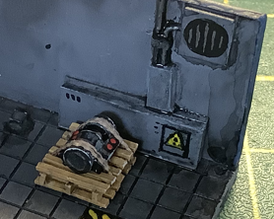
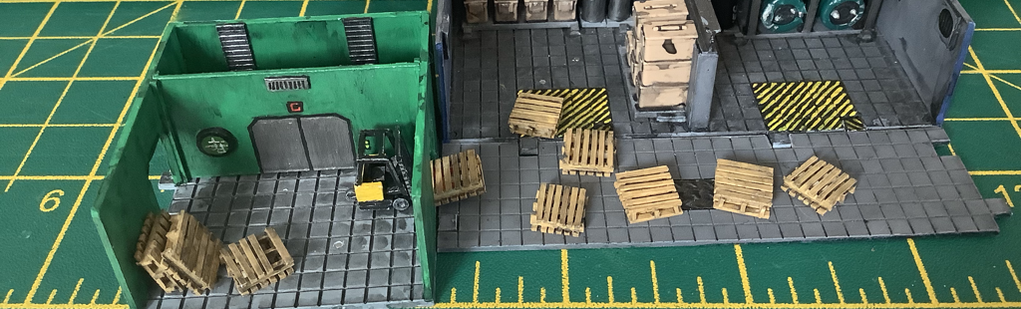
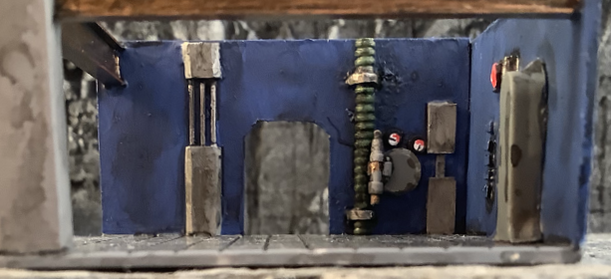
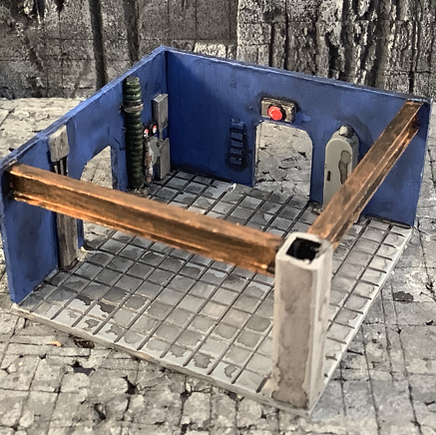
So the corner piece is a little plain as I resisted the temptation to fill it up with all sorts of details... ok I'm being lazy too. What I realised however was that the corner piece below has a pipe leading up into this room, hence the cabinet in the top corner next to the door. This has a little sign that says "Danger Water Pipe" and I tried to paint this too. Luckily after the first attempt, I knew it was a bit impossible and left it as a few scribble of paint instead. Unfortunately this set off a chain of thoughts and I started wondering whether the other large pipes below this level would need to align rather than just lead up into the ceiling and nothing else above it. Plus the corner pillar on this corner section is four times as large as the one below. I need some architect training :(
0 Comments
In total I have used eight magnets on the ground and have five movable pieces. I have seemed to spent more time on this set than intended and I still have a corner piece to complete and one newly planned weapon storage room to make.
It's possibly due to the repeating the paint scheme I decided upon for the crates that made this a slow progress. I tried to keep it simple with some black edges and then finish off with some gun metal. I decided to use some varied colours to brighten the place up so the place wasn't too dull, hence the red, blue and green coloured crates. As I didn't want to make any more, I decided to use the barrels and jerry-cans I bought a long time ago. And one final odd engine type piece to finish it off. As I have a lot of 1 mm magnets, I decided to add it to one of the crates that had fallen off, so I can move that about. I haven't decided whether to add magnets to the bottom of all the other pallets yet. To the left is my corner room that I decided to deviate from the standard room design, although making four columns from scratch was even more tedious, boring and long.
I started with using the Guillotine to make some crates, but even that struggled to make nice vertical cuts. Hence a bit disappointed. Luckily after starting to make the pallets, everything looked brighter to the point I made ten of them in one sitting. I even went the length of putting the strips on both sides that seems overkill as the bottom will likely be glued to the ground (as per the one in front of the service lifts). I even made them so that they can be inserted into the fork lift truck as per the picture. At this point I would normally try and buy some wood coloured paint as I hate mixing colours. I never seem to get the same again later, however luckily the Desert Yellow more or less fit the job. I only just received a pot of Uniform Grey as it seems the floor is coloured from an old pot of half dried grey and black pot. Luckily this grey matched better than the first pot of Castle Grey I purchased.
The last of my Imperial Guard Gunman. I was so scared of trying to modify the hands, but at least the ankle is nowhere near as fragile as the other Guardsmen. As the hand wasn't touching the head, I carefully added a tiny piece of plastic to represent the finger scratching the head. I was almost tempted to craft a ? and somehow suspend it over his head.
I'm slightly glad that I kept the lift sections simple as I quickly replicated this one. However the front wall still remains removable and as the original had the floor removed behind the doors, I did that too just in case. However the plastic sheet between the floors doesn't. Hence wasn't much point to be honest. I just have a lot of empty connecting sections still to make to fill out B1 level.
I was tempted to add more detail to the walls and fill out the bare floor space, but decided for a quick and dirty approach. So I now had a corner piece to ensure the next level above would have more stability. Hence Basement Level 2 now complete that consists of the Service Elevator leading to the Toxic Disposal Chamber, Security Sector and the Science Wing (all under the Diorama section).
I did the mechanical clamps on the Thunderhawk Transporter. I don't think I ever retried anything like that since, however found it far easier to do this time around. Hopefully as I'm more careful and have a bit more patience. There is still the magnet to hold the arm to the wall with a supporting bracket so it doesn't tilt. The claw head spins, but only because it is still using a magnet but to make it hold better there is two magnets rather than one.
|
Categories
All
Click here for Category definition
Archives
April 2024
|