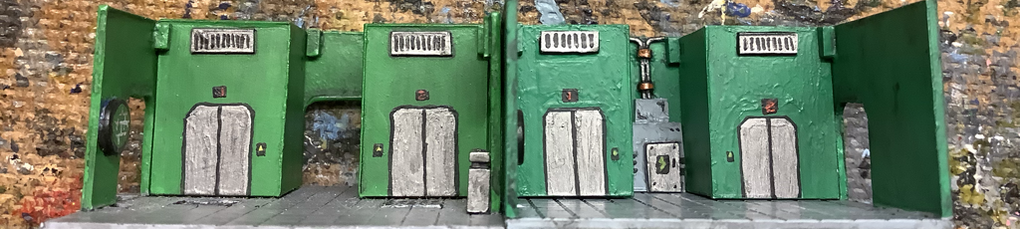
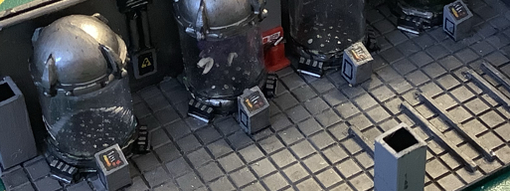
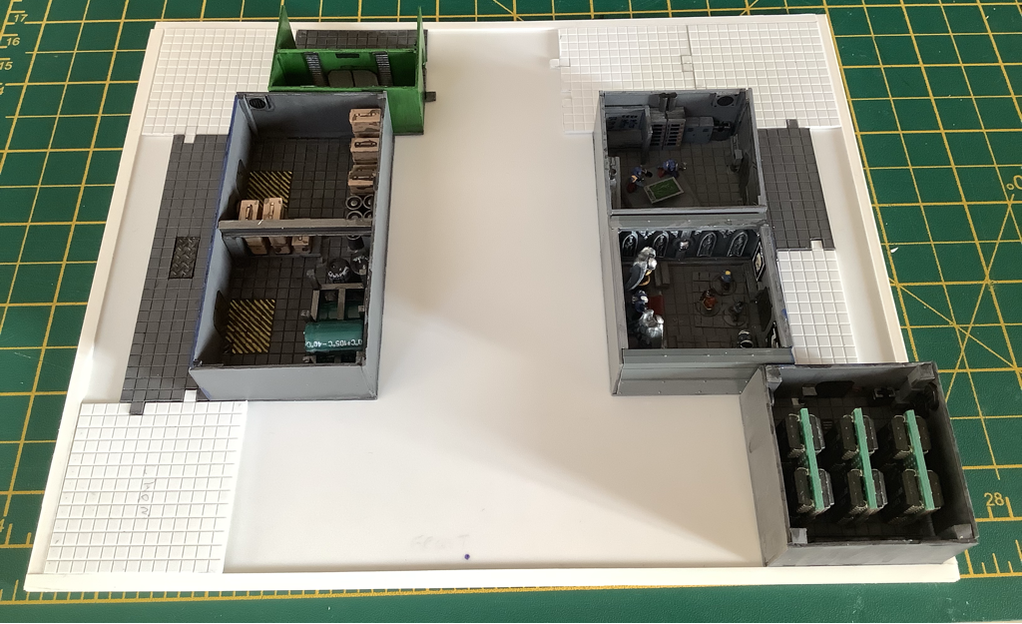
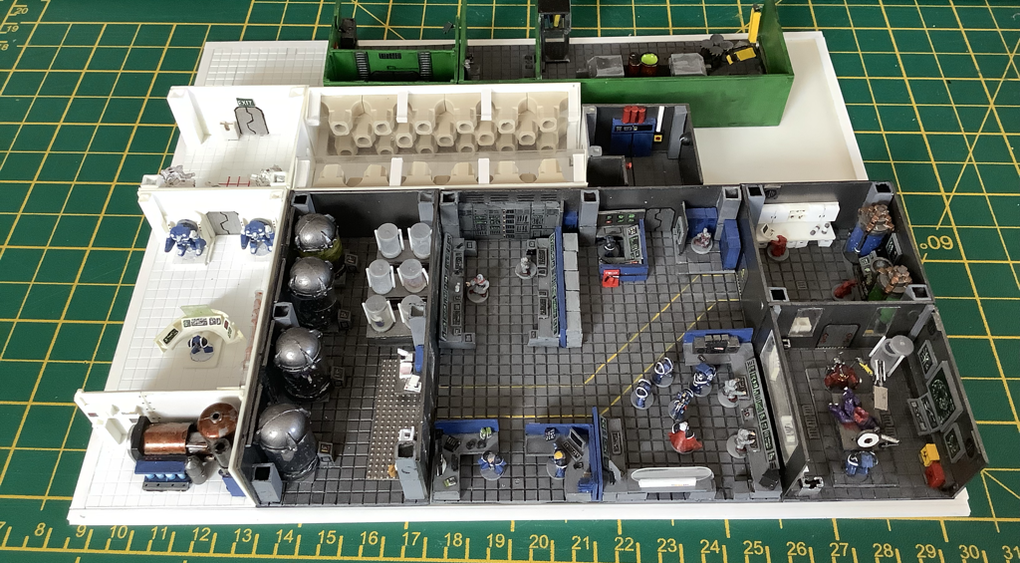
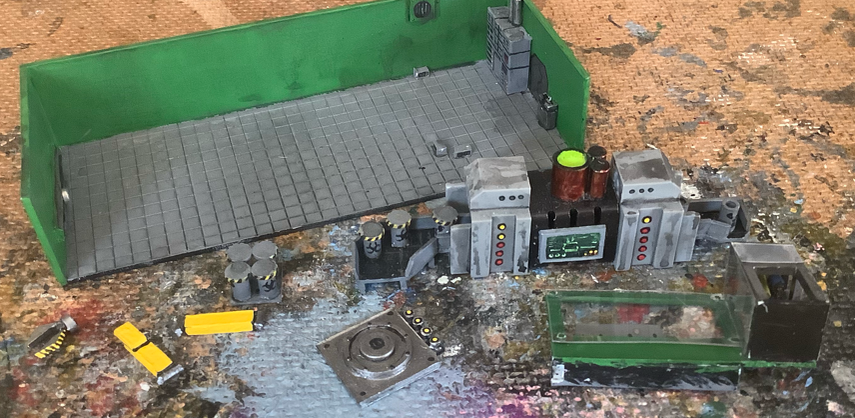
Possibly one of my quickest paint job. After all the effort of painting Woodland Green on the model (one on the right) I decided not to cover it with the original Scorpion Green (one on the left). I didn't go overboard with any detail either hence the empty side walls other than the round map on the left side. After taking the photo, I realised one of the lift doors is shorter :( The lift walls section are bit tighter resulting in the paint chipping when being removed. Luckily I forgone the extra detail on the inside so these walls will likely become permanent.
0 Comments
Not only I need to be steady and accurate in painting straight lines, I also need to be quick before the droplet of paint dries too! Take too long and the paint clumps together and I don't have a smooth surface and having to forfeit the remaining paint. I guess using droplet bottles in a way good that the whole pot of paint doesn't dry, but then having to estimate how much paint to squeeze small amounts out and repeating numerous times, makes painting much slower. At least I'm painting again. I even found a large bottle of Woodland Green that I can use as a base coat before applying the Scorpion Green on top.
From the random angle Ork pieces to the eyeballing Tau, I'm back to precision cutting and wish I owned a laser cutter to do the job. I decided to continue with the existing lift design right down to the removable walls. Inside the lift section painted on the wall is a "B" for basement, but this existing piece will no longer be used for the basement as I would be blocking the door between the lifts. As I didn't want to wait and paint the side walls before I glue them, I decided to just paint on a piece of plastic and glue it in place when needed. It took several attempts to thinly slice the lift walls to get them to align to the floor tiles. Now to decide what I can add to make this section and the corner section to look less plain.
added small side clamps instead that worked just as well to keep the Vats in place. Now that the floor/ceiling fitted flat, I could start planning the next level. It turned out I had a Storage Room (with no pictures) that I wanted underground too to be connected to the Service Lifts. So I planned another basement level and currently it is relatively empty. I still have a few decisions to make. I ended up having a late night just cutting a lot of corner and room pieces. Also I seemed to have made several corridor pieces, two with pipes finished with lower wall sections and a final one with the higher walls. Although a lot of these will not be required as I'm condensing things together. With a lot more shelf space and a lot of pieces to fill out, I realised I didn't have much Scorpion Green left for the walls and I had no dark grey to match the existing floor pieces. More excuses not to paint!
So I opted to use a full sheet of plastic, taking 80% of an A4 sheet of plastic and worked with a lower lip to slot on top of the first layer. However the first glitch was that there were two rooms with items that slightly exceeded the height of the standard room, hence removed when taking the below photos. Also I didn't worry about the lift section yet as the upper section I built had a hole in the ground in case I wanted to try and model a moving lift. Luckily I wasn't planning many floors as the front adn back lip were different thickness and I can see this leaning to one side as I built upwards.
The good thing about Epic is that a piece of A4 plastic lasts quite a while... unless it's making something like this. I was reluctant to use my last thickest piece, but as I haven't touched it for several years, it was finally going to good use. I have numerous other thinner A4 pieces that would not have been stable as this last piece. Despite having an Angle Ruler, cutting straight lines and edges still prove a bit elusive especially trying to get a strip that is the same width along the full length. Hence the lip I added to the base wasn't always straight :( So the next problem if figuring how to make a second layer that would stay aligned to the lower level while giving me enough stability to place the next on top... Do I forfeit a whole sheet of plastic... or do I try and save myself some plastic and cut strips to make a mesh to lay on top...
idea required changing the Toxic Disposal Chamber orientation so the entrance was to the left rather than the right. Which wouldn't be too hard considering all the pieces came apart. I'm not even sure why I did this. With a new layout I could now start on the two pieces that was on the list; the Entrance Hall and the connecting Central Command.
Finally reached the end, although that's not exactly true. I decided to abandon the extra shoulder armour as the shield wings got in the way. Also missing is any support systems and the secondary weapons. However I think I need a break and do something different. Three months I've been working on these three... or four if you count the prototype with a larger body and stubby legs :( Not sure what to do with that one. Considering I was planning six in total, another three would likely result in half a year working on these Tau Riptides. At least despite not gluing the upper body to the legs, they balanced quite well and remained standing. It's also unlikely I'll start painting these either :(
|
Categories
All
Click here for Category definition
Archives
April 2024
|