Space Marine Mountain HQ
I always wanted to make a dynamic HQ like those in the strategy UFO PC games where you could specify the component and where to build it within the area allocated. When I completed my first few pieces, my wife called it a doll house. True, it could be described as a guy's doll house, but it's just like the board sections of Space Hulk too.
The start was to determine the size of the pieces. I wanted the corridor large enough to fit the square bases and two side by side long bases. I also wanted to fit the 2nd edition Carnifex in the corridor. I went with 30mm wide, but was smaller than my outstretched Carnifex, but was too far down the line to change it. Also making it any wider would make it unreasonable for a Space Marine HQ. The walls I decided to have 15mm tall using 1mm thick plastic card, which meant it posed a problem for my Carnifex again, but as I wasn't going to add a ceiling, I didn't worry too much about keeping the mechanics correct.
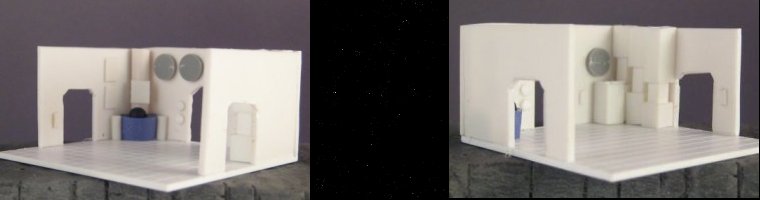
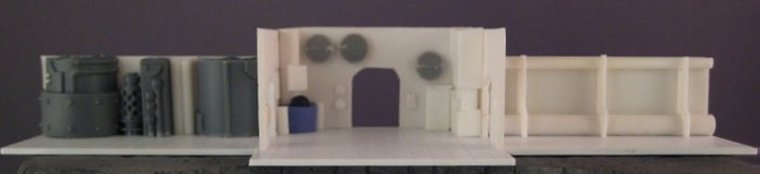
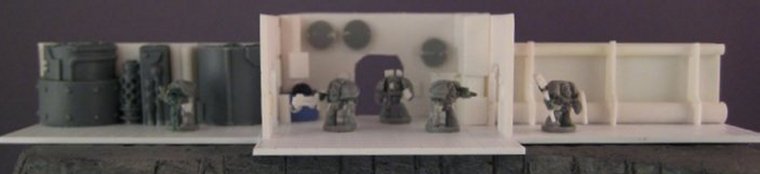
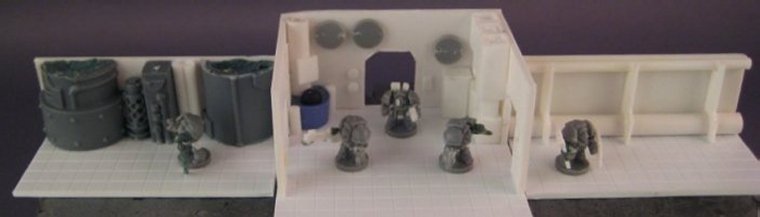
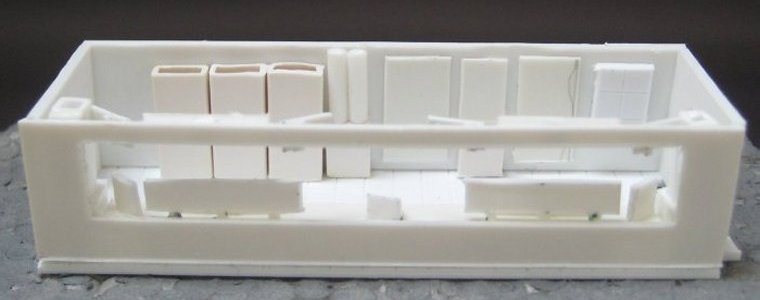
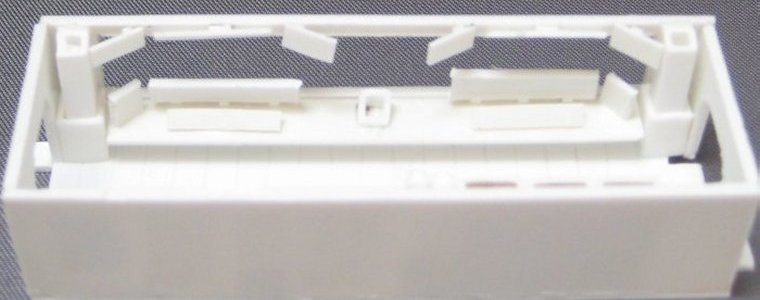
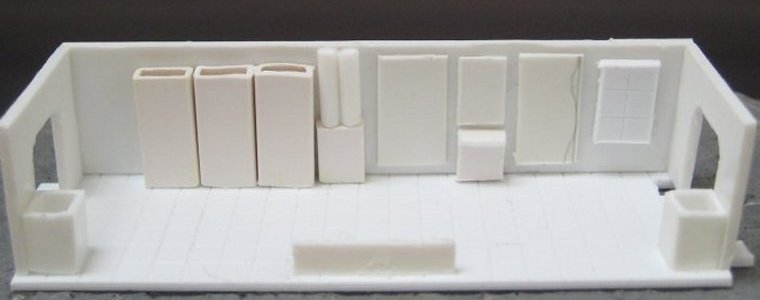
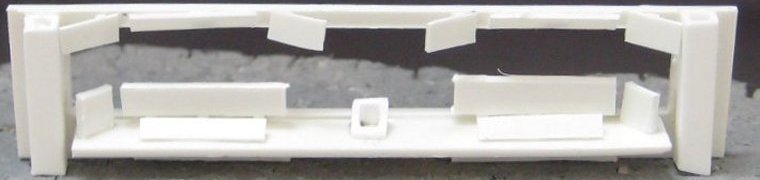
Forward Command Centre
To get myself started, I decided something special. The size can vary for these and I opted for 40x40mm. I did some research, looking for images of console panels and command HQ, looking into real life and games for inspiration. Servers, control panels, loads of screens, some lockers and a small weapons area. Originally I had intended on the doors to slide open and shut, but the layer of paint made this difficult. The doors actually slide open and shut, but with a lot of effort and paint being scratched off.
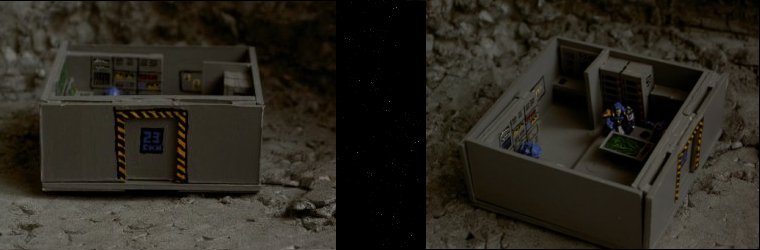
The walls actually come apart so I could take photos inside, but due to the layers of paint, didn't hold together neatly, hence a make-shaft bar above it to hold it together (not shown in picture).
I decided to make the Space Marines mounted separately so I could move and reposition them. I didn't want to make things too static. What's the fun if you can't move the doll about in your doll house.
Corridor Sections
As I would require many of these, the design had to be quick to make and dynamic to be used where-ever it is required. The walls I decided to add straight forward buttress 2mm wide 5mm from the edge and 10mm between. This meant that when pieces fit together, there is 10mm between each one (8mm if you want to be precise).
Designing how they would fit together proved a problem as I didn't want to just stand them together. I was tempted to use my magnets, but that would be too costly. After a failed attempt, I went with small tabs to slot them together. It was sufficient for the moment. I would have liked to sandwich the tab, but that would mean yet another layer of plastic card (1mm for the base, 0.5mm for the tab/slot).

Each section was 30mmx30mm and the straight corridor would have protruding tabs. The intersections (T junction shown in the left image and a corner on the right) would have a slot beneath for the tabs. I also created some smaller intersections and also a longer 70mm corridor.
Paint wise, I just kept things simple and painted it all codex grey. Yep, no shading either! I decided this as I anticipated this being a very boring job. Occasionally I added some details such as panels, junction boxes and pipes to make it less boring.
Intersection Space Hulk
This is an intersection piece based on a famous Space Hulk Diorama (See WD357 pg22). As I now found the textured plastic card, it meant the base was slightly larger than my original 40mmx40mm. I din't fully follow the Diorama due to materials available. The black sphere in the corner is actually a small bead. The circles on the wall are epic bases.
Space Hulk Diorama
This is the whole piece with two corridor sections based on the Space Hulk Diorama. The left section uses pieces from the 40K ruin building sprue. Also posed in the section is my Space Hulk 2009 Terminators.
Afterwards, I decided I needed a method to slot the pieces together like my previous attempt. I went with a different design and had a single square cut out and another square protruding for each side. Bit like a jigsaw, but it meant that no matter which direction I had each piece, they would still slot together (currently not shown).
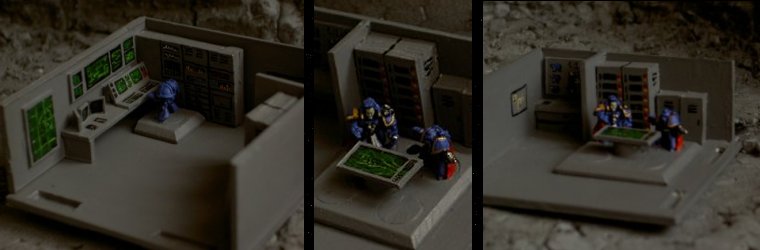
Control Tower
This is the control tower that I will be using for the Titan Hanger bay that I have been planning for many years. I spent a week and this is probably the fastest piece I finished. I used the same methods as the previous pieces including the slot tabs. I made sure that long slot base could fit in between the walls too.
With a little ingenuity, I was able to craft this so the front wall actually lifts up. I just hope when I paint it, I will still be able to do this.
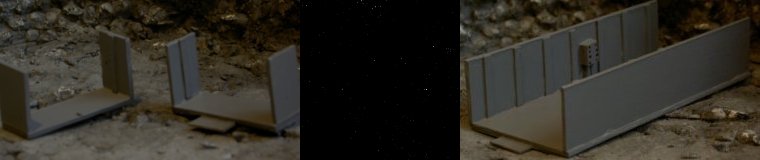
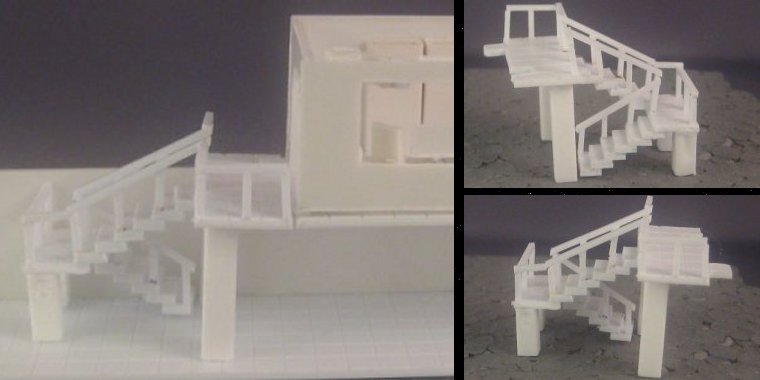
Stairs
This is the stairs to the Control tower from the lower level. When I started on this, I was planning to be able to place a single figure on the stair case. However once I put the rails, I reduced the amount of space I had and so not actual usable other than the top platform. The amount of glue I had to use for this was intoxicating so hence it will be a while before I work on the other set for the other side of the control room.
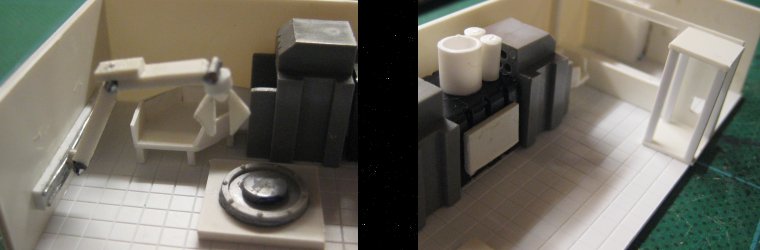
Disposal Chamber
The initial idea was to have a large machine that would fill barrels of toxic waste so that I could paint bio-hazard logos. Hence I started gathering a few pieces I salvaged from old network device. With a bit of plastic card I added to either end to represent the conveyor belt.
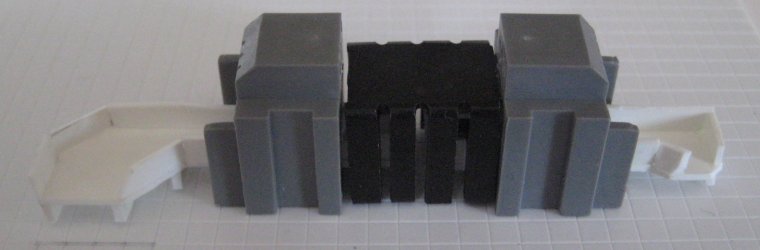
Unfortunately I didn't think this idea through as I wanted the barrels to be disposed via a tunnel into the centre of the earth or something along that lines. Hence the logic of even bothering to fill them in barrels seemed obsolete when I could have had the pipes just dump directly into the hole. However I went ahead anyway.
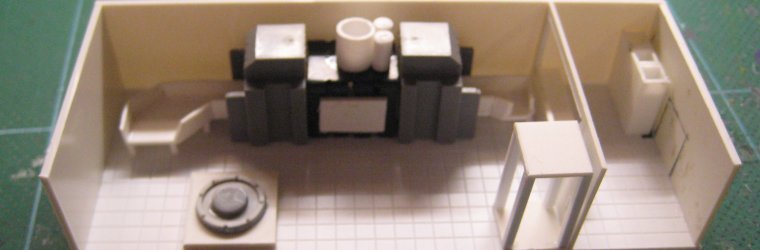
I wanted the area to be contained so had a small monitor room to the right. I was originally going to put a robot to move the barrels, but came up with the idea of the mechanical hand. With a bit of planning and use of magnets, this is fully poseable (albiet a bit fragile).