
Officio Assassinorum
|
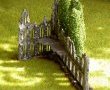
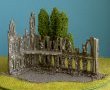
Assassins Guild (for short) began with a simple picture of the Vindicare Assassin crouched on top of a column sighting down his sniper rifle. Of course, lacking the enthusiasm and skill, I set out to build a scenery piece first to lay the foundation. The scenery piece that I chose to build did not reflect that of the picture, and after two attempts, I was finally satisfied (almost) of the finished setting for my first assassin
|
|
After seeing so many people making snipers from scouts, I finally decided it was time for my first assassin. Armed with the Assassin Codex, I began what I originally set out to do. After my first few chops and messing with green-stuff I realized I was confronted with time, green-stuff takes time to dry and I still had some left over. And though with the different pictures before me, the Assassin's Guild emerged and I started working not on one Assassin, but a Guild of them.
Below are the different assassins I worked on and how I went about making them.
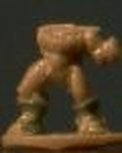
Crouched Vindicare Assassin

|
This began as a humble scout. The arms were chopped off, the shoulder pads trimmed, backpack sliced off and the right side of the face cut. I needed the head to be looking to its left, so instead of attempted to twist it, I decided to use green stuff.
|


|
Green stuff was added on the back of the assassin to replace the scout backpack I cut off. Although not too bothered with my first few attempts, before the green-stuff was set, I accidentally flattened it. Having to try again, I managed to make it look better than the first few times!
|
|
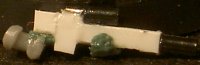
Although I worked on the sniper rifle before I started with the green stuff, only here I added the hands with the green leftovers. The rifle was made from plastic card and the original epic troop banners for the barrel and sniper scope. I used the original scout (left) hand for the right hand holding the rifle and some green stuff for the left hand.
|
|
|

|
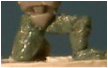
The leg of the scout was cut from the torso and then cut into three again. These were used in an attempt to re-create them in a kneeling position. The cut pieces proved harder to use than I expected, after binding the foot with the lower leg, the thigh was just not the ideal shape to use. Adding to the problems, the left leg flew from my fingers onto the jungle of fibers that made up my carpet. After half an hour of looking for a needle in a haystack, I built the leg from scratch and was pleased with the result.
|
Being the impatient person I am, I decided to continue with this model even though the legs had not set. The end of the sniper rifle was added and then the upper arm was wrapped around it. The gun was glued to the chest of the scout and then the green-stuff was smoothed onto the torso to form the shoulder. The other arm was then added to complete this piece. All that really remained was positioning the whole thing correctly. As the legs were not set, I was able to shift parts of the model about until I was satisfied.

All that was left to do now was to wait for it to dry and paint it. This was then entered into a competition.
Callidus Assassin
I believe someone tried this before using an Eldar Harlequin and I was eager to try myself. The Eldar Harlequin model was ideal, but it meant that the Callidus Assassin weapons are reversed, and so this assassin became left-handed.

|
After chopping both arms off and slightly carving off the features from the head, I used green-stuff. It was probably a mistake to take the whole arm off, but I decided that I would make a second Callidus Assassin and continued with this model.
|


|
I took a las pistol from the beast-man and was happy with the resulting Neural Shredder I created when it jumped free from my tweezers and onto the floor. Another fine piece of work lost to the carpet. Spending another half an hour in search of the newly lost creation and the previous loss of a leg, I found the Genestealer leg I lost a while back instead. Giving up, I started again, although not as good as my first attempt, I had pretty much given up on this model.
|
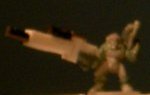
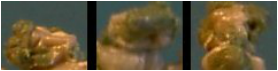
Poised Vindicare Assassin
|
This was the third Assassin model that I began work on. Using an old chopped up beastman (with pistol and sword), my first task was to make the feet look more like boots than hooves. The hanging cloth between its leg was also removed.
|


|
Patience is not one of my virtues, before the right arm could dry, I was working on the remaining one. After cutting off the arm, I decided it would be better to build it from scratch. The pistol came from another SM model, as it was too small to add details (after loosing a previous attempt to the carpet) I decided to leave this for the day and wait for it to dry.
|

|
|
This was finally glued to a base I cut from a piece of plastic card using a compass(?) cutter. This was a challenge itself as the cutter didn't always keep with the same cut, resulting in a less than perfect circle. The rifle was lowered a little and a small amount of green-stuff added to the top of the pistol.
This completed the third assassin. |
Eversor Assassin

|
The SM medic had a perfect Neuro-Gauntlet, but once again on the wrong arm. I was not too bothered as this was the first attempt. I started by carving off some details and the shoulder pad from the medic. I added a small bit of green-stuff on top of the original pistol and tried to square it off. Using the pin, I put a hole in the end to make it look more like a scope. The barrel of the old Eldar Guardian las gun was cut and trimmed. This was glued onto the end of the pistol to represent the Needle Projector. The sword was cut from the SM banner and that fitted nicely into the medic's backpack.
|
|
|
All that was needed was the small round ball on the end of the pole over its right shoulder to finish this one off. I simply rolled a small amount of green-stuff and waited for it to dry before gluing it to the end. The original base of the figure was trimmed and then the figure glued onto some plastic card cut into the shape of a circle.
|
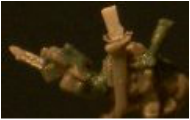
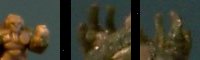
Culexus Assassin

|
I found another damaged Beast-man and decided that this was ideal for the Culexus. Cutting off the sword left a clenched hand that looked like it was holding a Psyk-Out grenade. The head would need some work and also new feet as they were about to break off at the ankles.
|

|
I started working on the right arm, only to have the model fall off the base. I continued with the arm, using my tweezers to shape the arm by gently pressing the green-stuff between the tweezers and to shape the pointing finger. I then glued the model back onto its base.
|

|
|
While working on the head, the model fell of its base several times. I should really let the glue dry a bit longer. A small amount of green-stuff was added to the flat front of the base to make it a bit rounded. The right side of the head, the horns were in the correct place, so all I tried to do was add green-stuff to make it look smooth.
|
A large blob was added to the right side in an attempt to cover over its eyes. The small round blobs on the back of the head were intentional (honestly) to make it look like the Psi-Stalkers from another game.
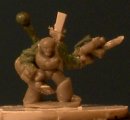
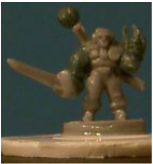
Eversor Assassin No2

|
Finding another old IG Gunner, the body of this matched that of the Eversor (It had a small round circle on the left side of its chest). Although the stance was not ideal, this would become my second Eversor Assassin. The arms were sliced off as little could be done with it and I would rebuild the arms from scratch. I was still undecided whether to keep the head or not.
|

|
Taking the sword from a SM Banner figure, I added this to the model and shaped the arm best I could. This time instead of using green-stuff, I found an old Eldar Guardian las gun and glued this to the back instead. A small blob of green-stuff was then added on top.
|
I wanted to the right arm to have a bit more detail, so instead of just using green-stuff, I carved the hand off a SM captain and stuck this to the end of the arm. The detail on the hand was barely visible, but at least it provided the right shape and size. This effort was later wasted as I tried to put the Hypodermic Incisors on them. This was probably the hardest task of this project. I was tempted to only have one sticking up, but then added the remaining two. Once again I had to resist the temptation to bend two of them back leaving one upright.
|
|
|
Impatient as I am, I decided to finish this model off and took a SM bolter and used the same technique as before. Taking a trimmed Eldar las gun to make the Needle Projector and then some green-stuff to extend the magazine clip and made a handle. As I worked on a flat surface for this (making sure I wasn't using tweezers to hold it), I realised that I was shaping the wrong side. With a heavy sigh, I glued it onto the back of the assassin to finish it off. It was only now that I realised that the Executioner Pistol had the magazine and grip combined. One small flaw I would normally correct if it wasn't getting late. My final regret was not trimming the original base. Unwilling to risk messing up the Neuro-Gauntlet, I glued the figure straight onto the circular base.
|

|
Lessons Learned
Although the following may be common sense, its good to remember when you're trying to do something like this.
A few lessons I've learned after this project.
- Lesson 1 - Green-stuff takes time to dry and it take longer than 30 minutes.
- Lesson 2 - At least some forward planning is good. After finishing a model off and then deciding to trim off the original base risks messing things up.
- Lesson 3 - Green-stuff takes longer than an hour to dry.
- Lesson 4 - If small bits fly from your tweezers, be prepared to start again. Once lost on a carpet, its a waste of time looking for it... unless you feel lucky.
- Lesson 5 - Green-stuff takes several hours to dry.
- Lesson 6 - And finally, glue takes time to dry too.
Finally revealed
Finally I have completed the tower for my assassins. I also completed an additional Callidus Assassin, originally planning a second Culexus, but decided he would lead the others instead and remain as a single one (edit - link to be updated when that part is created)
